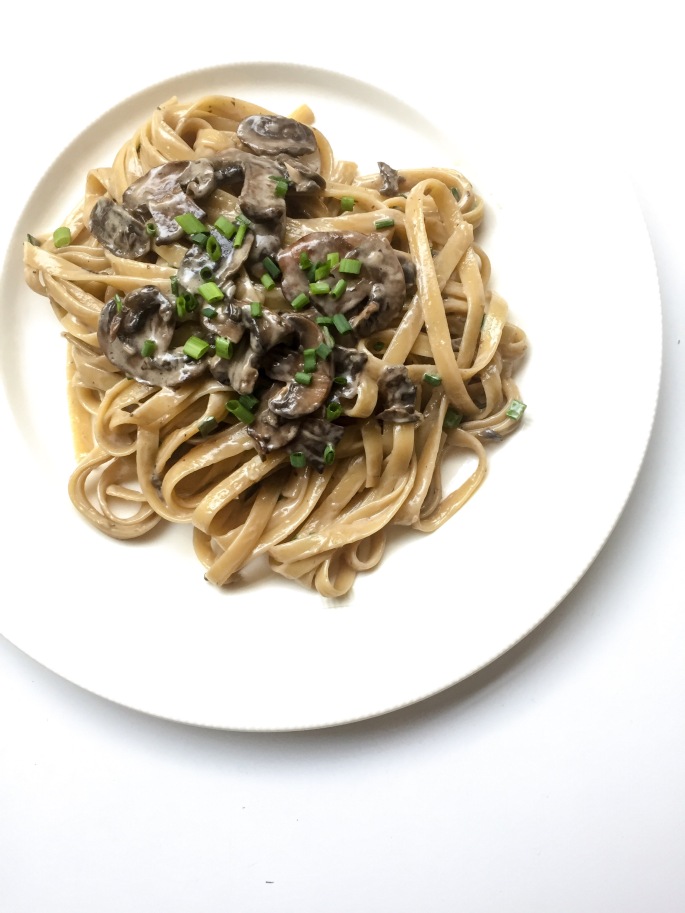
Mushroom and Chive Fettuccine Alfredo

A slightly ~*~fancy~*~ version of a comfort food classic. Eat with crusty bread and a nice white wine.

Mushroom and Chive Fettuccine Alfredo

Serves 6
Hands-On Time: 30min
Total Time: 30min


Ingredients

1 lb fettuccine
4 TBS butter
1 lb sliced white or baby portabella mushrooms
3 cloves garlic, finely minced
1 1/4 cup heavy cream
3/4 cup grated parm + more to taste
1/2 cup finely chopped chives (half added, half as garnish)
1 tsp salt + more to taste


Cook the pasta according to package directions in heavily salted water. Once cooked, drain and set aside.

While pasta is cooking, melt the butter in a large skillet over medium-low heat. Once melted, add the mushrooms and 1 tsp salt and cook until soft and dark brown, about 12-15 minutes. Add the garlic and sautee until fragrant, about 1 minute. Add the heavy cream and stir to combine, then allow to simmer for about 5 minutes or until slightly thickened.

Toss the pasta with the sauce in the pan until coated. Add the parmesan and 1/2 cup chives and toss again until cheese has been evenly incorporated into the sauce. Add additional salt at this point if you’d like.

Serve immediately topped with reserved chives.


Zucchini Mascarpone Galette

I’ve never been a huge ricotta fan. I know it’s supposed to be bland, since it serves as a base for other flavors, but it usually leaves me wanting something with a little more oomph. So when I realized how much I liked Smitten Kitchen’s Zucchini and Ricotta Galette, I figured I could make one I liked even better if I replaced some of the ricotta with a slightly more flavorful cheese. Enter: mascarpone. A little creamier and with a more pronounced cheesy flavor, it fit the bill perfectly.

Zucchini Mascarpone Galette

Adapted from Smitten Kitchen

Serves 6
Hands-On Time: 45 min
Total Time: 1hr 30 min


Ingredients

Crust:
1 1/4 cups flour, chilled in freezer for 30 min
1/4 tsp salt
1 stick cold unsalted butter, cut into small pieces
1/4 cup sour cream
2 tsp lemon juice
1/4 cup very cold water

Filling:
1 lb zucchini, sliced 1/4 inch thick
2 TBS olive oil
2 garlic cloves, minced
1/3 cup ricotta cheese
2/3 cup mascarpone cheese
1/2 cup grated parmesan cheese
1/4 cup shredded mozzarella

1 egg yolk beaten with 1 tsp water


Preheat oven to 400 degrees. Line a baking sheet lined with parchment paper or a silicone mat.

Make dough: Whisk together flour and salt in a large bowl. Sprinkle butter pieces over flour and use your hands to combine until the pieces of butter are no larger than small peas. In a small bowl, whisk together sour cream, lemon juice and water and add to the butter-flour mixture. With your hands, combine until large lumps form. Gently pat the lumps into a ball, cover with plastic wrap, and freeze for no longer than 20 minutes (remove to the fridge if you need more time to work).

Make filling: Spread the zucchini over two layers of paper towels and sprinkle lightly with salt. Let sit 30 min, and then blot the zucchini to remove water on the surface. In a small bowl, whisk olive oil and minced garlic together – set aside. In a separate bowl, combine ricotta, mascarpone, parmesan, mozzarella, and 1 tsp of olive oil mixture and add salt to taste.

Flour a large flat work surface (I like to lay down parchment paper and then flour to contain mess). Roll out the chilled dough into a 12-inch round.

On a floured work surface, roll the dough out into a 12-inch round. Transfer to the prepared baking sheet.. Spread the cheese mixture evenly over the dough, leaving a 2-inch border. Arrange the zucchini, with slices slightly overlapping, in concentric circles from the outside edge of the cheese mixture to the center. Evenly drizzle the remaining olive oil and garlic mixture over the zucchini. Gently fold the plain edge dough over the very edge of the zucchini circles, pleating to keep together as needed. Brush the exposed dough with the egg yolk/water mixture.

Bake the galette about 30 to 40 minutes, or until the cheese has puffed up a little and the zucchini are slightly translucent. Remove from the oven, let cool for about 5 minutes, and then transfer carefully to a serving plate. Serve in wedges.


Lamb and Zucchini Sandwiches

Lamb and Zucchini Sandwiches

Loosely adapted from Smitten Kitchen

Serves 4
Hands-On Time: 1hr
Total Time: 1hr


Ingredients

Lamb Patties
2 large slices french bread
1 small yellow onion, diced
1/2 cup loosely packed fresh parsley leaves
1 lb ground lamb
1 tsp salt
1/2 tsp allspice
1/2 tsp cayenne
1/4 tsp cinnamon
1/4 tsp black pepper

Tzatziki Sauce
17.6oz container Greek Yogurt (I usually just use one of the medium Fage containers)
1 large cucumber, shredded
2 TBS fresh dill
3 cloves garlic, peeled
1/4 cup olive oil
Salt to taste

Assembly
1 lb zucchini, sliced thin on a slight diagonal (mandoline is great here)
4 large pita
Salad greens
Olive Oil


Make the patties: In a bowl, cover bread slices with lukewarm water and set aside for 10 minutes. Squeeze the bread to get as much water out as possible and place in a large bowl.

Pulse onion and parsley in a food processor until very finely chopped, then add to bowl with bread along with lamb, salt, and spices. Mix with your hands until well combined. Form into 8 patties about 4 inches in diameter. Refrigerate for 30 minutes before grilling.

Meanwhile, make the tzatziki. In a food processor, combine all ingredients except salt and olive oil and pulse until well combined. With the food processor running, slowly add olive oil until combined. Transfer sauce to a serving bowl and season with salt to taste.

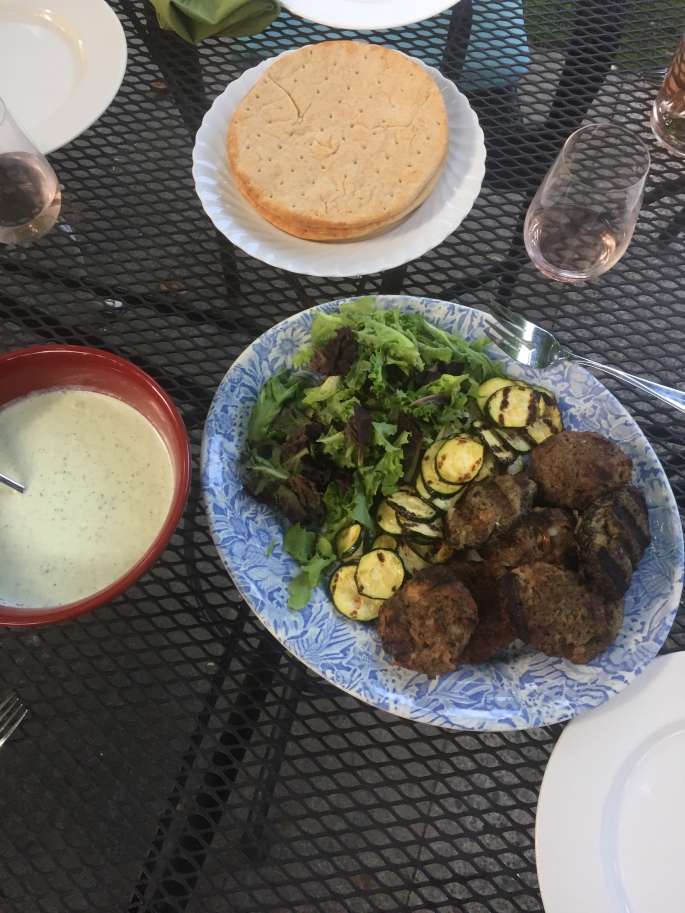
Toss the zucchini slices with a tablespoon or so of olive oil and a teaspoon of salt. On a grill over medium-high heat, grill the zucchini slices until tender, about 2-3 minutes each side. Remove to serving platter.

Grill the lamb patties over medium-high heat until firm and cooked through, about 6-8 minutes per side. Warm the pita over medium-low heat on the grill until lightly toasted but still flexible.

Serve all components separately and allow people to assemble their sandwiches with pita, salad greens, zucchini and 1-2 lamb patties. Top with tzatziki.


Summer Fridge Frittata

We’ve been so lucky this summer to have a ton of beautiful produce from our Spoonfull Farm CSA, but we’ve also been so busy that sometimes, cooking doesn’t end up happening. That means that some weeks we find ourselves with a whole mountain of produce on our hands that we would hate to see go to waste. Enter: the summer fridge frittata, so named because it’ll clean your fridge right out if you play your cards right. This is really what frittatas are made for – making leftovers new again (and getting great use out of our beautiful farm-fresh eggs in the process)!

Summer Fridge Frittata

Serves 6
Hands-On Time: 30 min
Total Time: 45 min


Ingredients

12 large eggs
2 TBS half and half
1 cup + 1 TBS sour cream
1 head kale, any variety, roughly chopped
1 large zucchini, thinly sliced (I use a mandoline, see note below)
1 cup shredded/grated cheese (I used half parmesan and half mozzarella because I had them on hand)
1 bunch scallions, white/light green parts thinly sliced
1/2 TBS red pepper flakes
1 TBS garlic powder
Juice from one lemon
2 tsp salt, divided, plus more to taste
1 TBS minced chives + more for garnish
1 TBS minced fresh dill + more for garnish
Olive oil


Preheat oven to 425 degrees.

Whisk eggs until yolks and whites are well combined. Add 1 TBS sour cream, half and half, and cheese, and whisk together. Add at least 1 tsp salt, whisk to combine, and set aside.

In a 10-12 inch ovensafe skillet (cast iron is best!), heat a thin layer of olive oil over medium heat. Add scallions and cook, stirring occasionally, for about a minute. Add zucchini slices and toss with oil and scallions. Add 1 tsp salt, red pepper flakes, and lemon juice, and toss to coat. Cook until slices start to become translucent and soft, about 3-5 minutes. Add chopped kale and allow to wilt and cook down, tossing with the zucchini and scallions, about 5 more minutes.

Pour the egg mixture evenly over the vegetables and gently stir to distribute egg and vegetables. Once edges of the eggs have set, about one minute, carefully transfer the skillet to the preheated oven. Allow to bake anywhere from 7-14 minutes – the eggs should be set, and the top should be slightly puffed and golden.

While the eggs are baking, combine the remaining cup of sour cream with the chives and dill in a small bowl, and set aside.

Once the frittata has finished baking, remove from oven and let cool at least 5 minutes on a cooling rack in the pan. When ready to serve, slice into wedges, garnish with reserved chives and dill, and top each wedge with the herbed sour cream mixture. Serve with toast, a light green salad, or both.

Note: I use my mandoline slicer at least twice per week, if not more, so I can’t recommend them enough. HOWEVER. You have to be extremely careful when using them, and never use a mandoline without a protective hand guard. I use this mandoline from OXO, which includes a protective guard.

Surprise Teriyaki Chicken & Grilled Bok Choy

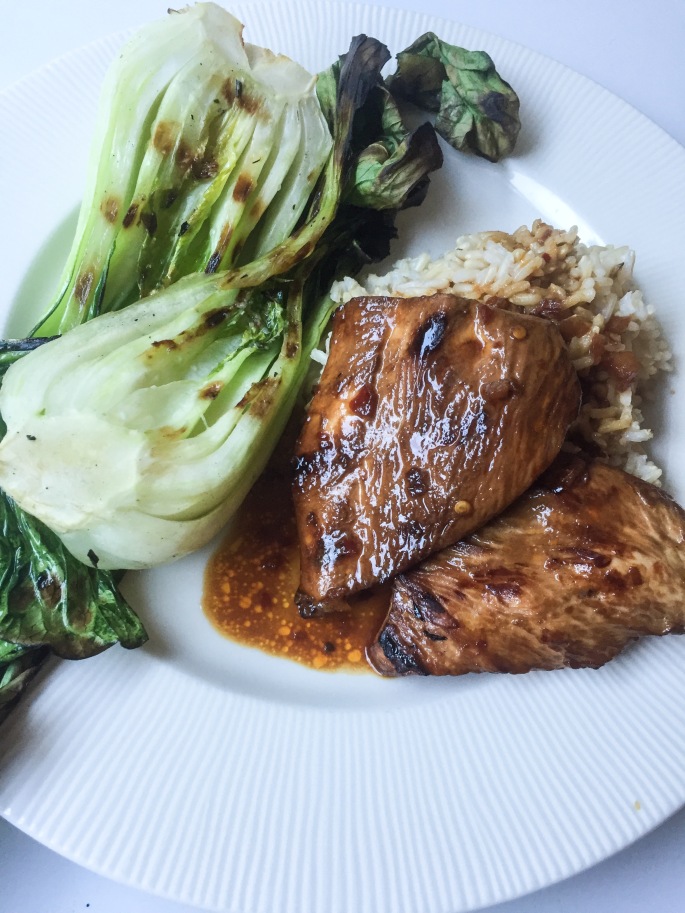
So there aren’t any cool surprises about this recipe – the surprise was mine when the marinade I threw together because I thought it would taste good tasted exactly like teriyaki *facepalm*. But that’s okay, because a recipe for teriyaki chicken that you can throw together with pantry staples and class up with some grilled veggies is great in my book. And, for the record, I wasn’t wrong about it tasting good.

Surprise Teriyaki & Grilled Bok Choy

Serves 4
Hands-On Time: 45min
Total Time: 45min + 8hrs for marinade time


Ingredients

2 chicken breasts, cut in half
4 baby bok choy
White or brown rice, prepared according to package instructions

Marinade
2 cloves garlic, minced
2 tsp ginger, minced
1 cup soy sauce
1 cup rice wine vinegar
1/2 TBS chili oil
1 TBS sesame oil
1 TBS sugar or honey or agave syrup


Whisk together all marinade ingredients in a baking dish. Put chicken in the dish with the marinade and use a spoon to coat the top side with sauce. Cover and let sit in the fridge 6-8 hours (you can leave it up to 24 if needed – it’ll still be good, but a bit saltier than it would otherwise).

Once you’re ready to start cooking, preheat your grill to medium-high heat. Halve each baby bok choy, leaving the tough connecting stalk at the bottom. Brush the cut side with vegetable oil. Grill, starting with the cut side, until tender and slightly charred, about 3-5 minutes on each side.

Remove the chicken from the marinade and set the marinade aside, reserving it. Grill the chicken until there is no visible pink when cut into, or a meat thermometer reads an internal temp of 165 degrees. Let rest 5 minutes.

While the chicken is resting, pour the reserved marinade into a saucepan over high heat and bring to a boil for at least 1-2 minutes (THIS IS IMPORTANT BECAUSE YOU JUST USED IT TO MARINATE RAW CHICKEN). It may be reduced enough for your taste at that point, if not, continue to simmer until it’s the consistency you like.

Serve chicken over rice topped with the sauce formerly known as marinade, and with the bok choy on the side.

Note: I grilled the bok choy and chicken because it’s August and I don’t want to deal with the stove more than I need to, but there’s no reason you couldn’t pan-sear both of them, or roast both of them, or cook them any other way that gets the job done.


Mike’s Fish Tacos

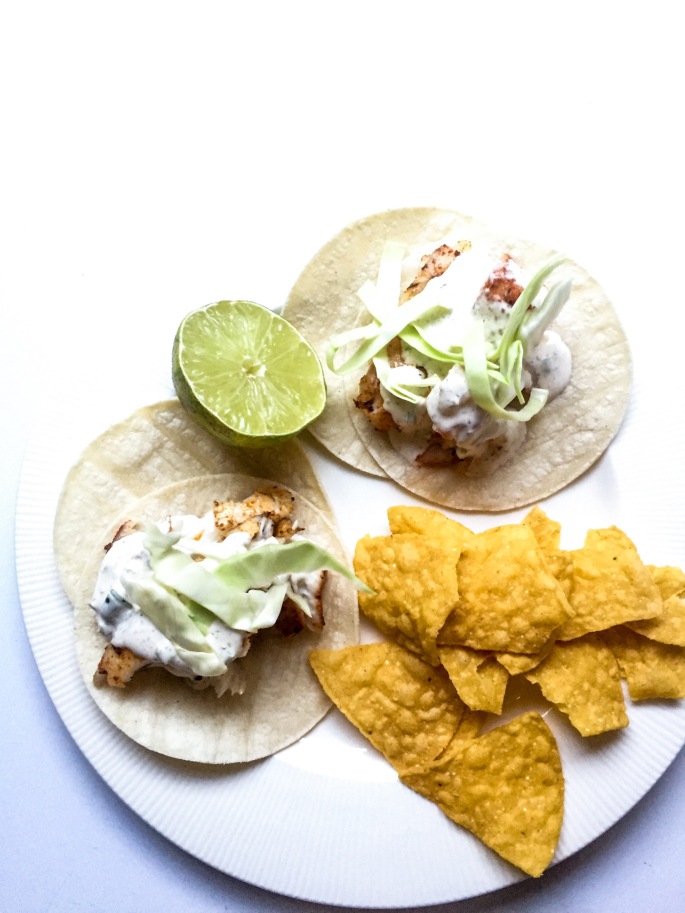
Kyle’s Dad makes these amazing fish tacos. Now you can, too. The secret, in my opinion, is the sauce – I’d happily sub it in nearly any fish dish that calls for tartar sauce (and I love tartar sauce). Use any whitefish you’d like – I’ve used tilapia and cod and they’ve both worked well, but halibut would be tasty too.

I am, sadly, a cilantro-tastes-like-soap person, so you’ll notice this recipe calls for none. Feel free to use it liberally in both the sauce and as a garnish if you have more cooperative taste buds!

Mike’s Fish Tacos

Serves 4-6
Hands-On Time: 30 min
Total Time: 1hr 30 min


Ingredients

Sauce
1/2 cup mayonnaise
1/2 cup sour cream
1/2 tsp cumin
1/2 tsp dried coriander
1/2 tsp dried dill
1/2 tsp dried oregano leaves
1/2 tsp chili powder
1 tsp minced capers
1 jalapeño, ribbed and seeded and finely minced
Juice from 1/2 a lime

Seasoning
1 TBSP sweet paprika
2 1/2 tsp salt
1 tsp onion powder
1 tsp garlic powder
1 tsp cayenne
3/4 tsp white pepper
3/4 tsp black pepper
1/2 tsp dried thyme leaves
1/2 tsp dried oregano leaves

Assembly
2 lbs Tilapia or other white fish
2 cups shredded cabbage
Corn or flour tortillas


Make the sauce: Whisk together the sour cream and mayo until combined. Add the lime juice and whisk until fully incorporated. Whisk in remaining ingredients. Let sit in the fridge for at least one hour.

Make the blackening rub: Whisk together all of the seasoning ingredients.

Rub the fish with the seasoning mixture. If you have leftover seasoning, store in an airtight container. Grill the fish for 5-7 minutes each side or roast in a 425 degree oven for 15-20 minutes. Break into bite-sized pieces.

Assemble tacos with tortillas, fish, shredded cabbage, and sauce. Add a spritz of lime, if you’re feeling fancy. Enjoy!

Note: If you’re a mayo-hater (who hurt you?), you can definitely use all sour cream, or even greek yogurt. It won’t be quite as rich, but it’ll do the job.


Weeknight Rice Noodles with Meatballs

Weeknight Rice Noodles with Meatballs

Serves 4-6
Hands-On Time: 30 min
Total Time: 30 min


Ingredients

Sauce
2 1/2 cups beef broth
1/2 cup soy sauce
1/4 cup rice vinegar
1 TBS grated or minced ginger
2 TBS sesame oil
2 TBS honey
2 tsp chili oil

Meatballs
1 lb ground beef
3 tsp onion powder
2 cloves garlic, minced
1/2 tsp red chili flakes
1 tsp salt

Assembly
16 ounces rice noodles
1 lb mixed sliced mushrooms of your choice (I like to include at least some shiitake)
4-5 baby bok choy, halved
Bunch scallions, white/light green parts thinly sliced, dark green parts roughly chopped
Vegetable oil for frying meatballs


Cook the noodles a minute or two shy of the package directions. Drain and set aside in a large bowl.

Whisk all of the sauce ingredients together in a medium bowl. Set aside.

Combine the ground beef, garlic, onion powder, salt, and red pepper flakes in a medium bowl. Shape the mixture into about 16 meatballs (1 1/2 inches across). Heat vegetable oil in a large pan over medium-high heat. Cook the meatballs in the oil until browned and mostly cooked through, about 7-9 minutes. Transfer to a separate plate or bowl. Add the mushrooms to the pan with vegetable oil and meatball drippings and cook until browned. Add bok choy and sauté until tender, about 5 minutes. Add the dark green parts of the scallions and cook another 2 minutes. Add the vegetables to the bowl with the noodles.

Add the broth to the pan and simmer until slightly thickened, about 8-10 minutes. Add the meatballs in for the last 2 minutes of cooking, turning occasionally. Pour the meatballs and sauce over the noodles and vegetables and toss to combine. Serve topped with the thinly sliced scallions.

Note: If you’d like the sauce to be slightly thicker, whisk together one tablespoon of sauce with one tablespoon of cornstarch and combine with remainder of sauce before simmering.


Sous Vide Steak with Chimichurri

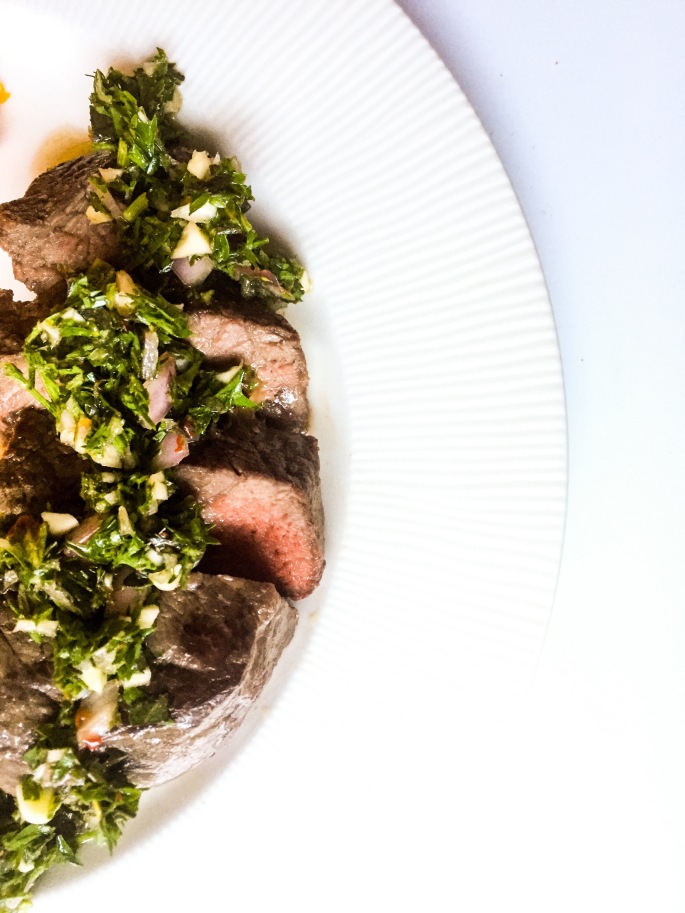
I’m obsessed with cooking steaks sous-vide. It always turns out perfectly, you can set it and forget it while you prepare the rest of dinner, and it’s overall less messy. Yes, you still need to use a pan or grill to sear the meat before serving, but the pan gets less dirty than it would if you were fully cooking the steaks in it. Topped with some carrot top chimichurri prepared while the steaks were cooking away with no effort by you? Mmmm. Perfect. I use and love Joule Sous Vide by ChefSteps (I am generally wary of IoT and bluetooth connected appliances, but the app has SO many cool cooking guides and the machine works fantastically) but there are a lot of great options out there.

Sous Vide Steak with Carrot Top Chimichurri

Serves 4-6
Hands-On Time: 25 min
Total Time: 1hr


Ingredients

2 lbs sirloin steak
1/4 cup + 2 TBSP extra virgin olive oil or butter
1 1/2 TBSP kosher salt
One batch of Carrot Top Chimichurri


Place steak in a gallon sized, freezer-safe zip-top bag and add 1/4 cup of the olive oil or butter and the salt. Cook according to directions from whatever sous vide mechanism you’re working with.

Once the steak has finished cooking, heat a large pan with the remaining olive oil or butter over medium-high heat. Sear the steaks for 1-2 minutes per side, or until the meat no longer sticks to the pan and has a nice brown crust.

Remove the steaks from the heat and let rest for 10 minutes before slicing. Slice and serve topped with the chimichurri.


Linguine with Prosciutto and Breadcrumbs

A few weeks ago, NYTFood published a list of quick and easy summer meal ideas by Mark Bittman. I made one of the suggestions while rushing to get out the door to the airport, desperate to avoid overpriced and meh airport and airplane food. It came together like a dream, even allowing for elaboration and personal touches. Keeping the garlic roughly chopped allows it to get soft and roasty, and the crispy prosciutto adds a nice crunch. Here’s my dressed-up take on Bittman’s excellent suggestion.

Pasta with Prosciutto and Breadcrumbs

Adapted from #14 on this list of summer meal ideas

Serves 4-6
Hands-On Time: 15 min
Total Time: 15 min


Ingredients

1 lb linguine
1 1/2 cup panko breadcrumbs
3 cloves of garlic, peeled, crushed, and roughly chopped
3oz prosciutto, roughly chopped
Juice from 2 large lemons
2 TBP butter
1/4 cup + 2 TBP extra virgin olive oil
1 tsp crushed red pepper flakes
Salt for pasta water
Basil for garnish


Cook pasta according to package directions in heavily salted water. Drain, place in a large bowl, and toss with 2 TBP of olive oil and the lemon juice.

In a large pan, heat the remaining olive oil and butter over medium heat. Add the prosciutto and cook for about one minute. Add the garlic, breadcrumbs, and red pepper flakes and cook until the breadcrumbs are toasted and the prosciutto is crispy.

Pour the breadcrumb and prosciutto mixture over the pasta and toss to combine. Serve with basil leaves and lemon slices for garnish!


Pesto Pasta Salad

This pasta salad is an excellent summer dish – it’s versatile and a great way to use up fresh summer produce (basil! tomatoes!). Bring it to a potluck, serve it as a side dish, or enjoy it as the main course. Missing the protein? Toss some cubed salami or torn prosciutto into the mix. The best part is it takes nearly no time to throw together when served hot, and no additional effort, just a rest in the fridge, if served cold.

Pesto Pasta Salad

Serves 4 as an entrée, 8 as a side dish
Hands-On Time: 10 min
Total Time (if chilled): 40 min


Ingredients

1 lb pasta (I used penne, but any bite-sized pasta would work well)
2/3 cup pesto (I used this garlic scape pesto)
1 cup reserved pasta water
1 – 2 large tomatoes, cubed, or 8oz cherry tomatoes, halved
8oz fresh mozzarella, cubed, or 8oz mozzarella pearls
Basil, sliced in chiffonade
Salt for pasta water


Cook pasta according to package directions in heavily salted water. Drain, reserving a cup of water from the cooked pasta.

Combine pesto with up to a cup of reserved pasta water (you may not need to use all of it – it should be saucy but not watery). Add pasta and toss to combine.

Optional: If you’re serving chilled, or making ahead, pop it in the fridge now for 30 min – 2 hours. More than that will make the pasta mushy.

Add cubed mozzarella, tomatoes, and about 3/4 of the basil and toss. Top with remaining basil and serve.


tomato_basil